
The benefits include:
- Pre-filling fields with default values to save time during data entry.
- Setting up automations with your CRM or Marketing Automation platform, making KAYO your single lead capture tool.
- Reusing your custom fields across all your forms with just one click.
Example: You can create a field asking for the meeting context, with the default value set to "Trade Show" if you usually meet contacts there, while still allowing users to change the answer to "Congress", "Conference", and so on.
If you have configured an integration with your CRM, this information can be automatically synchronized, eliminating the need to enter it manually after the event. KAYO becomes your single tool for qualifying contacts by pre-filling data in your internal systems.
Important: The language of your answer options must match the language configured in your CRM. If the expected value does not exactly match, the field mapping will fail.
How to Create and Configure Group Fields
- In Konnect, go to Group Management in the left-hand sidebar, then select Form Fields.
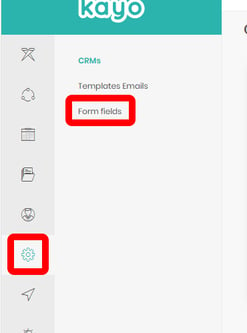
- Click Create in the top-right corner of the page.
The Field Label is the title displayed to users (usually the question or the information you want to collect).
Expected Value Type
- If the field expects free-text input entered by the visitor or sales representative (depending on the project type), select Text.
- If the field should offer a predefined list of options, select Select.
- If the field contains a large number of options, select formField.type.Autocomplete. This allows users to start typing the first few letters and quickly find the desired option.
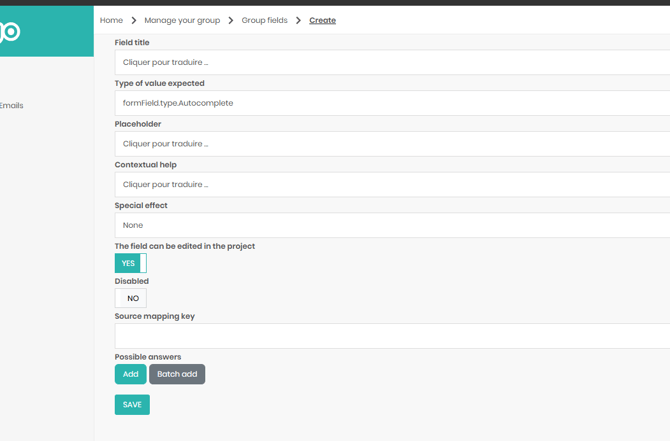
If you selected Select or Autocomplete:
- At the bottom of the page, click Add to create an answer option. Repeat this for as many options as needed.
- In the Value field, enter the answer text. If your project is multilingual, be sure to provide translations for each supported language.
- The Key field is automatically generated when you enter the Value.
If you already have a complete list of answer options, click Bulk Add to import them all at once instead of creating them one by one.
To set a default answer, enable Set as default value for the desired option.
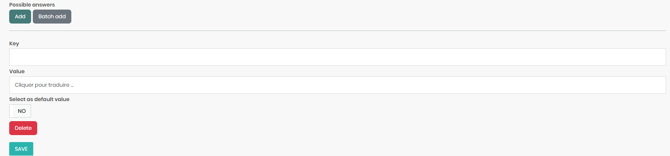
Once all your options have been added, click Save.
You can now open your project and access its qualification form. Your custom group field will appear alongside the other available fields and can be added to the form just like any standard field.
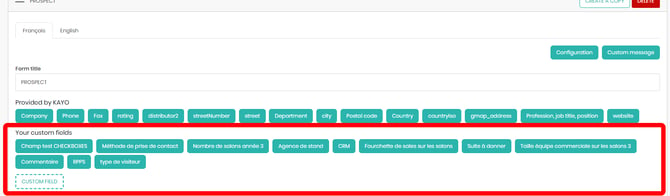
For more information, see our article: How to Create and Edit Qualification Forms.